

.jpg)
Here are some easily overlooked details to consider before launching your new Webflow website:
1. Optimize your images
Making sure your images are formatted and sized for the web is important to ensure the file sizes are not enormous and making your website very data heavy, so to speak. When your visitors have large file sizes to download in order to view your content, it can create a poor experience by having long loading times to paint your content on the page, or even eating up large amounts of a user’s valuable data plan.
Use these tips to help strip some unnecessary metadata from your images, size them appropriately, and export a much smaller file size to keep your website lightweight.
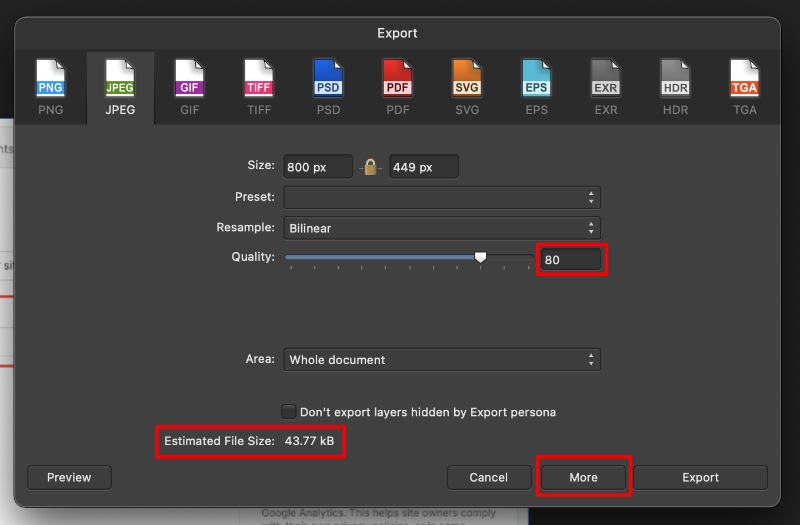
When you are ready to format your images for the web, be sure to check some of the default settings to make sure you are getting the smallest file size possible, but still retain a high enough quality image that it isn’t pixelated.
You can get away with lowering the quality of the image to about 70%, but I typically will set it to about 80% to be on the safe side. This will drop the estimated file size dramatically, so play around with the size of the image and the quality to get the most savings.

Under the “More” tab of the export window, you can also opt to deselect the “Embed metadata” and “Embed ICC profile”. This is simply additional data that is stored within the image file that allows extra information to be accessed and processed when opening the file with your chosen software. For images being displayed on the web, the data is unneeded and removing it can help reduce the file size.
Under this tab, you can also select the “Progressive” option to optimize the image even further. Depending on which program you use for editing images, this may or may not be named something else, or not be present entirely.
Lastly, you can use free tools to compress your images even further and end up with some fairly small file sizes for your images. TinyPNG.com is a great resource that is free to an extent. You can upload up to 20 images that are smaller than 5MB and they will compress them and show you how much data you are shaving off. They offer a premium plan where they take off the cap, but one workaround is to just refresh the page, or open up the page again in a new tab.
2. Metadata and page titles
Have you gone to a website before and noticed that the text in the browser tab doesn't make sense or maybe displays that it is some template theme of some sort? This is because the person setting up the website forgot to add page titles on the webpages to help with SEO and aid in helping visitors to know where they are.
You can avoid this by making sure each of your pages has a relevant page title and metadata that will help search engines crawl your page, display it correctly on their results pages and help your visitors know where they are through the information on their browser tab.
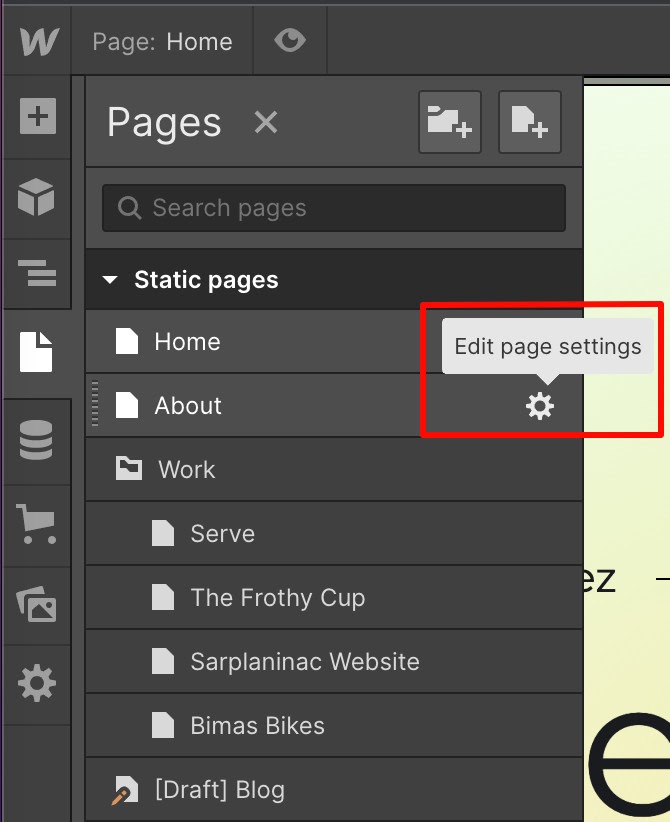
In Webflow, you can find the location to enter this data for the desired page under the “Edit Page Settings” gear of the Pages tab. When you click the gear, you will be taken to the settings tab and this is where you can enter metadata for the page, a page title, and even upload an image for OpenGraph (which is what shows up when you share your link socially).
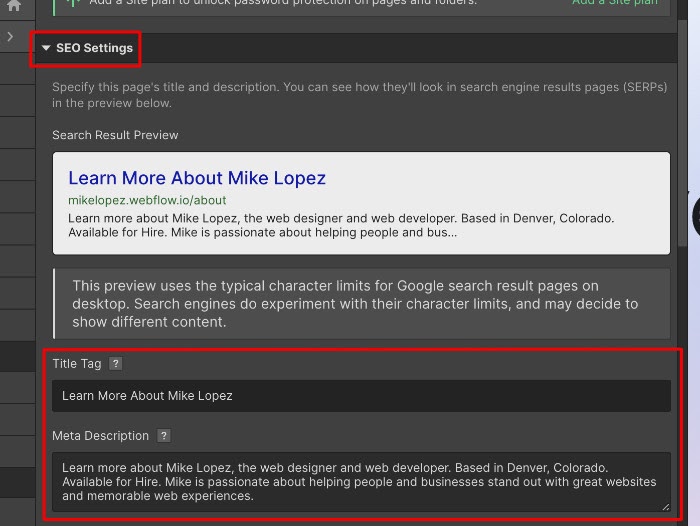
Under the “SEO Settings” section, you can enter a title tag for the page. Keep it concise and informative. Having something in the format of “[Page] | [Website Name]” is typical. For example, a page title could be “Home | Mikelopez.com”.
This is also an opportunity to enter the meta description for the page, which is the information that shows up with the search results for your website in search engines. You want to keep this information relevant as well, and try to incorporate some important keywords, but don’t spam them as it can negatively affect your ranking.
3. Favicon and Webclip images
A Favicon is the little icon that sits next to the page’s title in the browser tab. In Webflow, the default favicon is the Webflow emblem when you view your website on their staging domain. You want to make sure you have created and uploaded a favicon that reflects your brand and helps identify the tab your website is on!
Typically, a favicon is pretty small – 32px x 32px to be exact. You don’t want the design for your favicon to be too complex since much of the detail will be lost at those sizes. When designing a logo, forward thinking logo designers will anticipate and try to think of a logo that can be scaled down to these sizes and still be recognizable.
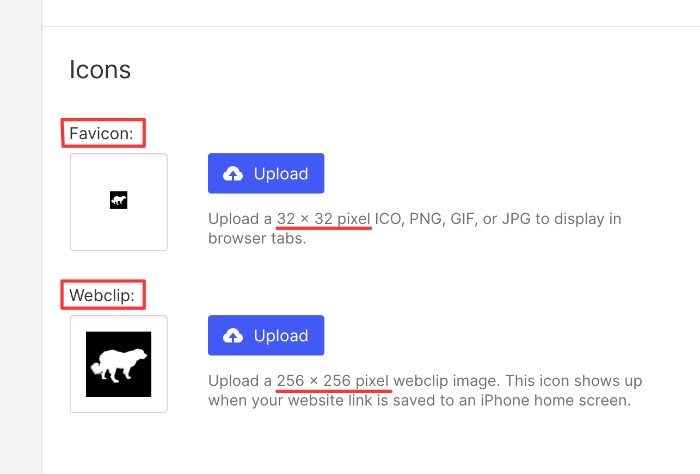
You will find the place to upload your favicon on Webflow under the “Project Settings” page within the “General” tab. This is also the place that you will upload your webclip icon. The webclip icon is an image that will appear when saved to a home screen of an iPhone. Typically, the webclip icon will be 256px x 256px large.
Android phones will also reference this icon depending on your browser and make, but it may show up slightly differently than it would on an iPhone screen. It’s important to know and consider how your website and icons can appear on different devices, to plan ahead and create a uniform experience across different browsers and screen sizes.
4. Connect your custom domain
Webflow is great in that you are able to stage projects on their servers to test and explore different ideas and websites. If you are about to launch your own website, be it personal or professional, you likely will want to have a custom domain that speaks to your brand or company.
You can find domains through various sources these days, but a popular option is Google Domains if you are looking for a suggestion to get started. Search for your domain of choice, and if it’s available, you can purchase it to connect to your website.
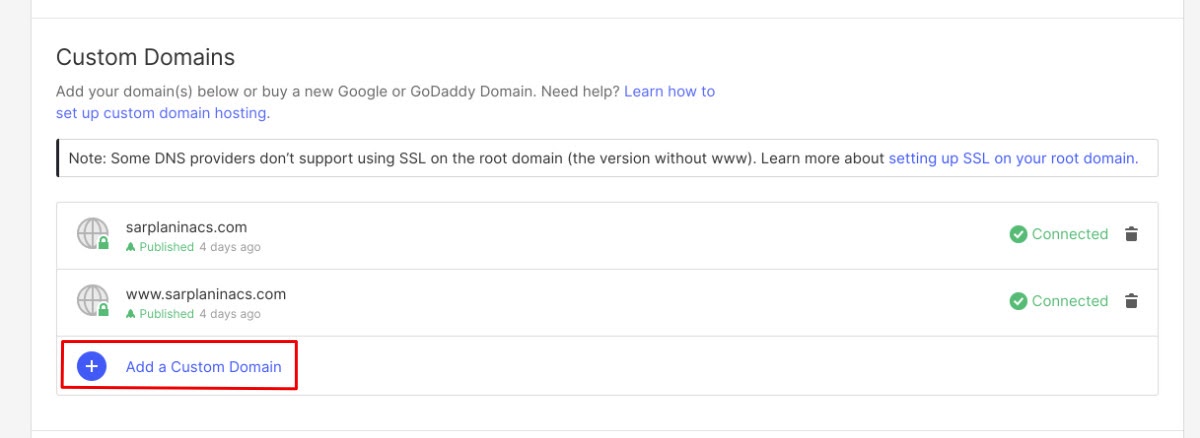
Under the “Hosting” tab within the “Project Settings” page, you can find the place to add a custom domain to your website. If you are unfamiliar with connecting a domain through adding CNAME and @ addresses, there are lots of resources to help walk you through this process. Webflow even has some helpful links right in the section to guide you if you have trouble.
Once your custom domain is connected, it may take a couple hours to officially connect and start directing visitors to your website via that URL. Just be patient and if it takes more than 4 hours, double check that everything is entered correctly.
5. Google Analytics
Leveraging analytics on your website is a great way to learn how your site is performing and whether it is being effective in gaining traffic and engaging users enough to keep them on the page. You can monitor click-through events and bounce rates to determine if certain marketing strategies are working or not, and adapt as needed.
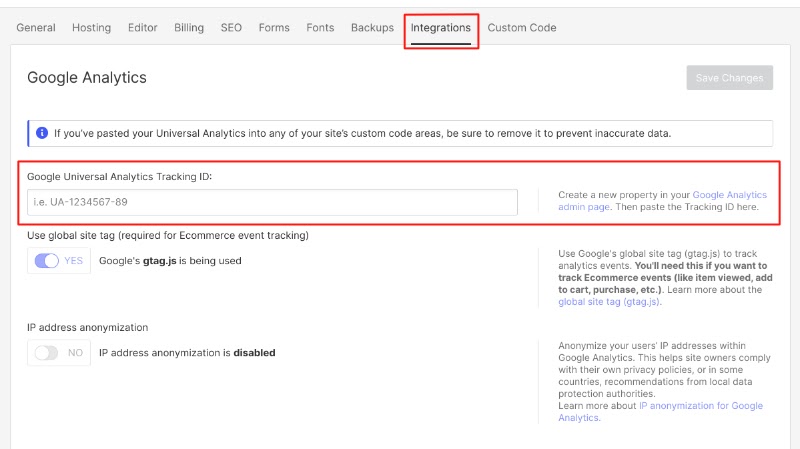
Setting up a Google Analytics account is very easy and Webflow also has helpful walkthroughs that will get you set up and connected in no time. I’d suggest just copying the Tracking ID to prevent any mistakes and link up the website correctly the first time.
6. (Bonus) HTML semantic tags (Nav, Footer, etc)
As a bonus tip, I suggest adding some HTML semantic tags to your website. Semantic tags in your HTML helps to tell the meaning of or purpose of specific elements to the browser and developers. For example, using a semantic tag of “Nav” for your navigation element will tell the browser that things inside this element have to do with navigation and are important.
Using HTML semantic tags also helps with your SEO and assists search engines to interpret the content on your website and can improve your rankings. To find where you can add semantic tags to your elements in Webflow, simply click the element and visit the “Element Settings” tab next to the “Styles Tab” to the right of the Webflow UI.

By selecting the “Tag” dropdown, you will see the list of available options for adding a semantic tag to your element. The most well known tags here are Section, Nav, Footer and Header, but there are more specific tags to explore if you are new to the idea of semantic HTML tags.


